Pages

Sunday, January 29, 2012

Edit Me Challenge: Week 4

So far so good (don't think I've missed a week since I started).  This cute little stinker was fun to edit.
Cropped.  Blurred some spots around the edge.  Used Paint the Moon "Instant Reflector" (twice), ran Paint the Moon "Warm Me Up Combo".  Masked the eyes back.
And for comparison:

Thursday, January 19, 2012

Edit Me, Week 3 Challenge

Really starting to love editing landscapes.  I'm not sure where this photo was taken, but it's a great one.  I cropped, cloned out some stuff that was leftover from the crop, cleaned up some noise (just to make the water a little more glassy), used an action to pop the color (though I'm not certain which one), did a little selective darkening (specifically on the roof of the boat because it was starting to look blown out), and a little vignetting around some of the edges.  Here's the before and after:

And a full size of the after:


Wednesday, January 11, 2012

Participating in my first Edit Me Challenge

Just trying to work on my PP skills -what better way than with someone else's photo...?  It was a great original shot, so that always helps.  Used Coffee Shop Blog's Baby PowderRoom to do most of the work (it's free!).

Sunday, January 8, 2012

So you want to learn to do your own digital photo layouts?

6 Ideas To Get Started

1.  Google.  I googled “digital scrapbooking”.  You’ll find more sites than you can keep track of (I’ll include links to some of my favorites).  Most offer freebies if you join their newsletters.  Lots of them also offer tutorials.  You’ll find that before you know it you’ll have so much stuff you’ll never be able to use it all (and this is just free stuff; naturally sometimes you’re going to see stuff you’ll want to buy, and they often run sales).  The best part about doing it yourself:  you can use the stuff again and again, you can change the colors, layouts, you can add or subtract anything you want – this is the ultimate in tailor-made hobbies.

2.  Learn the terminology.  For example, some people will call them digital backdrops, some will call them digital papers, some will call them textures, it’s all essentially the same thing (textures have an extra advantage over simply papers, but you could use them on any portion of your layout including the backdrop).  This is the same with the skills themselves (they’re pretty universal, so when you learn to do a page layout, you have the skill set to then do digital cards, to do album layouts (as opposed to scrapbooking which generally is more personal/less formal), to make your own storyboards, etc.

3. Find what suits you.  Like I said there’s so much free stuff available I advise you to pick and choose what you REALLY like.  And stay organized – this cannot be overemphasized.

4.  Find printers you like.  This is a bit of “you get what you pay for” (I’ve used Shutterfly, and now that I spend time on CM I can recognize deficiencies in color and paper quality, etc.).  I change printers/vendors based on needs: sometimes I want a 12x12 and don’t like the covers from one vendor, other times I get a really good deal on printing [GROUPON] and snatch it up knowing I won’t use it for a while, etc.  [I will, in another post, provide links to vendors I use/recommend.]

5.  After you’ve signed up for some blogs and newsletters that you trust and that make sense to you unregister from ones that are not as useful to you.

6.  I really wanted to start at the baby pics, but they are all SOOOOO adorable, how could I possibly choose? My best tip of all with regard to culling (or “weeding out”) your photos:  START BACKWARDS.  The longer you take picks and spend on photography websites/forums the better trained your eye and skill will be.  You’ll at least find it easier by the time you get to the baby pics.  Ultimately you’re still likely to have way too many but you’ll by then know how to find a home in your layouts for the not-so-perfect ones.

What am I going to do with all these pics?!?!

So, here’s the long and short of my advice (for what it’s worth)…  A (hopefully) brief summary of how I made these assessments.

1.  Love to take photos and was starting to get overwhelmed (what am I going to do with so many pics of little ones…?)  I paper scrapped, but it was taking forever (not to mention messy).
2.  Decided to do yearbooks, but didn't know a single things (this was July 2011).
3. Bought PSE, and started to dabble.  Began with my very own books (that’d be easiest right? I lived all this stuff I should be able to pull it together). Scanned everything and tossed it (it’s digital now, right, super:  love paperless, or at least streamlining down to one book). [We also move a lot, and lugging around boxes and boxes of stuff that may/may not ever get looked at can get expensive and a little bit nerve-wracking.]
4.  Had a computer meltdown (the nuclear kind) that was unrecoverable (I have exactly 3 pics left of myself from my entire life; no cards, letters, pics of friends/family, none of my professional certificates (paralegal, EMT).  Nothing.
5. Fortunately I still have all my kids’ stuff and got started (so they never have to be without a legacy - like their mom).  I’ve completed 20 personal books since last July (not ever having touched a bit of software before that time), and have since started working on many for others. 

The moral of this story:  You can do this.

First piece of advice:  Make a backup.  Always, always, always.  I look for on-sale storage:  CDs in particular (they last forever as long as you’ve got them in a safe place), and since their mine they don’t have to be pretty (I simply handwrite on them what’s included).

Second piece of advice:  Get stuff off your computer.  External Hard Drive is a good idea (plus the backup of course).  This’ll speed up your system and give you some piece of mind.

Third piece of advice:  Get your photos organized:  Your system has to work for you.  What works for me is to order them chronologically.  I have a folder for each year; inside that folder is a folder for each month.  The date info associated with each pic that is important to me is the date it was taken (this is not always the date that comes up: sometimes the date that appears is the date it was last accessed, or perhaps the date it was last edited, etc.). 

Your assignment:  Decide whether you have more money than time.  Also, now’s a good time to get started organizing those photos…just sayin… no matter which way you go (do it yourself or have someone else do it for you) you’re going to need some method of organization.
 

The Trouble With Weekly Projects:

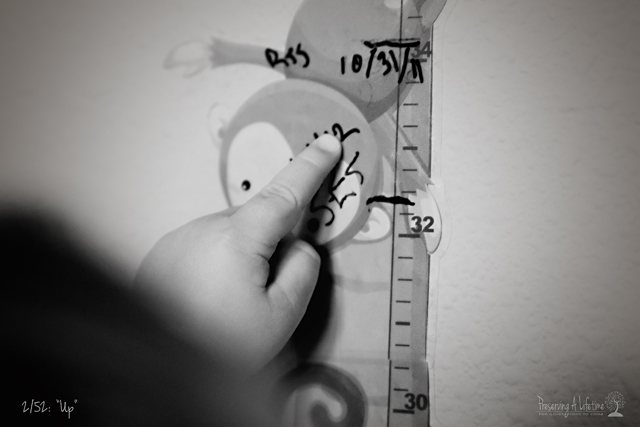
It's HARD.  Jeez, who wants to be creative every seven days....?  Anyway, I'm doing two this year:  one for Clickin Moms and one for Lens Pro To Go...

Here's this week's for CM.  Theme:  Up..

Saturday, December 24, 2011

For all the "Elves"

I'm a little out of practice, but here's my latest nonetheless... (all SOOC  a P&S set on auto, please forgive)...


Thursday, December 1, 2011

Composites (and Christmas Cards)

I loves me some Shutterfly (doesn't hurt that they're constantly offering me discounts).  My first ever photo shoot involved my sister-in-law and her family (wanted to get a Christmas card photo - hence the Shutterfly bit - and some other photos).  The house we were in was quite dark (the before's you see here are after they were converted in PSE from RAW where I did some major lightening/brightening, etc.).  If you ever need to know how to do a composite (or would like to talk about the Christmas miracle known as Photoshop Elements), let me know - I learned some valuable lessons here.

Wednesday, November 16, 2011

Perspective

(You were warned in the last post about a bit of flurry.)  So, things have been a bit difficult the last week or so for our household.  For instance, here's S (in a rare full-face appearance). 

I can tell you, you haven't had a bad day until you realize your BFF does NOT float.  (I apologize in advance for the quality of the photos.  They were taken on an iPod 4g because it was the closest thing I had, and these are the moments that Hallmark doesn't advertise.)

RYC101 Week 2 Mini Assignment

This week in class we're working on A LOT of stuff (in fact, I'm just getting caught up on week 2, and the course is actually in week 3, so expect a little bit of flurry as I try to get caught up).  Not to mention (among other things) I totally jacked up all my old photo posts, and now have to recompile them -- that's more time consuming than it sounds.

Here's the mini-assignment:
Photo 1:  Auto White Balance (AWB)
Photo 2:  Shot on camera preset
Photo 3:  Custom white balance (CWB)
This was fairly enlightening, because I thought my camera was doing "ok" with regard to the White Balance on presets, but (as you can see from picture 2) not so much.  The CWB is useful if you're taking portraits, or really trying to get things right (and have the time to set up).  But, for everyday snapshots (you know, the "hurry, get my camera, the girls are sitting next to each other and not hitting/slapping/kicking/fighting") I can't fault AWB a bit.